CREATE A SELF PORTRAIT
SUPPLY BOX
- Pencil
- Sharpie pen
- Hand mirror
- Watercolor paint
- Watercolor brush
- White paper
- Scotch tape
- Water cup
DRAW YOUR FACE, STEP-BY-STEP
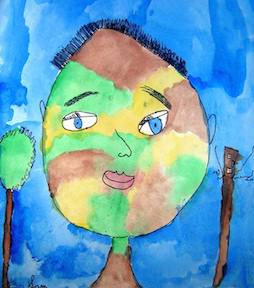
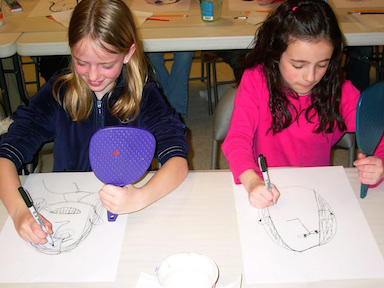
Use a hand mirror. Look carefully at your face. Look for shapes: circles, triangles, squares, ovals. These shapes can be used to describe different parts of our faces and heads. Use ovals for your head, lips, and eyes; triangles with curved edges for your nose; rectangles for your teeth.
Now look for lines: straight lines, curved lines, jagged lines, short lines and long lines. These lines can be used to describe our eyelashes, hair, eyebrows and smile lines. Use a large sheet of white paper and a black Sharpie pen. Tape the paper to the table. Hold the pen in one hand and a mirror in the other hand. Put the pen on the paper and start drawing your face.
Draw the shapes and lines of your face, working from one area to the next. Draw your head, ears, nose, eyes and lips. Don’t forget eyelashes, dimples, and freckles! Work slowly, looking at each part of your face carefully.
ADD SOME COLOR
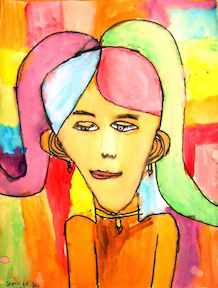
To add paint to your portrait, use the brush and plain water to get your paper damp in one area of the picture. Then mix water into your first color choice and add the color into the wet area on the paper.
Keep repeating this process, each time changing colors. Be sure to rinse your brush each time you change colors!
Click here for a printable PDF.