CREATE A LEAF PRINT
Capture the beauty of fall leaves! Use this simple printmaking process to create leaf prints. The process is simple and the outcome is beautiful and dynamic.
SUPPLY BOX
- Assorted fall leaves
- Ink or paint (assorted colors)
- Brayer or sponge brush
- Paper
- Paper plate
COLLECT SOME LEAVES
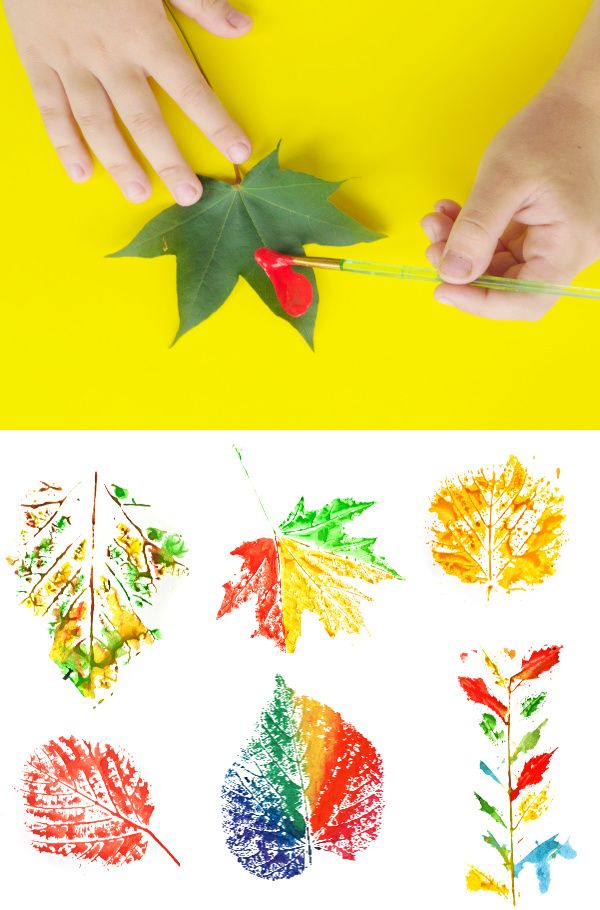
Go outside with a bag and collect some leaves. Choose leaves that are not too wrinkly or torn-up. It is important that you feel the leaves; try to find leaves that are bumpy on one side. These bumps are the veins, and they make the leaf easy to print.
PRINT A LEAF
Place the paper plate, a leaf and a clean piece of paper on a table. Be sure to turn the leaf so that the bumpy side is up. Squeeze some ink onto the glass. Roll the brayer through the ink and coat the roller evenly. Roll the brayer across the surface of the leaf. Carefully place the inked leaf on the white paper. Flip the paper over and rub the back of the paper with your hand. Flip the paper again and carefully remove the leaf to observe an amazing print!
Click here for a printable PDF.